How to Set Up OBS for Twitch: A Step-by-Step Guide
Are you ready to take your Twitch streaming to the next level? In this article, we'll show you how to set up OBS (Open Broadcasting Software) for Twitch streaming in just a few easy steps. Before we dive into the setup process, make sure you have OBS installed on your computer. You can download the latest version of OBS from the official website. Simply click on the download link for your operating system (Windows, macOS, or Linux), and follow the installation instructions.Step 2: Configure OBS Settings
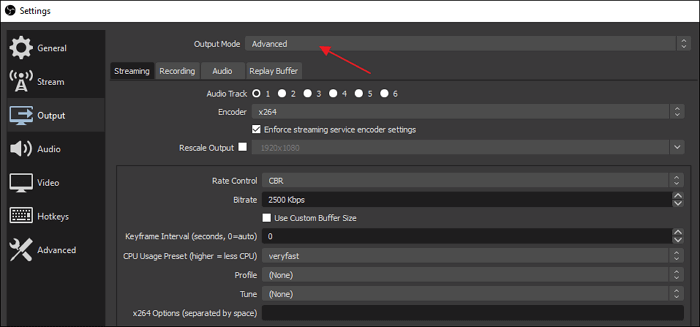
Once you've installed OBS, launch the software and navigate to the settings menu by clicking on the gear icon in the bottom left corner of the screen. From here, you can configure various settings, such as: * Stream settings: Set your stream quality, resolution, and bitrate to ensure a smooth and high-quality stream. * Audio settings: Configure your audio settings, including the microphone and speaker selection. * Video settings: Set your video settings, including the resolution and frame rate.Step 3: Add Sources
Step 4: Configure Your Stream Key
To stream to Twitch, you'll need to obtain a stream key from your Twitch account. To do this: * Log in to your Twitch account and navigate to your creator dashboard. * Click on the "Stream" tab and select the "Stream Key" option. * Copy the stream key and paste it into the OBS settings menu.Step 5: Test Your Stream


")


![Picture of How to Stream on Twitch Using OBS [with Images] - OBSBOT](https://resource.auditoryworks.co/nearstream-website/strapi/obs_guide_2_94ced7657c/obs-guide-2.jpg?x-oss-process=image/format,webp/resize,w_1024 "How to Stream on Twitch Using OBS [with Images] - OBSBOT")